The Fenner name is synonymous with drive and power. With over 150 years of engineering drive systems and power transmission behind them, they were well-suited for acquisition by Motion Asia Pacific in 2011.
BSC Product Manager for Drive Systems and Power Transmission, Troy Markland, says with Fenner under his belt, the future of manufacturing is looking alive — and fast.
“Technological advancements in the industrial landscape have come ahead in leaps and bounds,” says Troy. “More and more, factories are looking to increase the rate of their productivity through high-speed applications.”
In the manufacturing segment; the greater the speed of an operation, the higher the productivity and the more profitable the gains.
Fenner demonstrates an understanding of this concept through robust, versatile drive shaft solutions like Fenaflex Tyre Couplings that have high-torquing ability to accommodate the manufacturing industry’s need for speed.
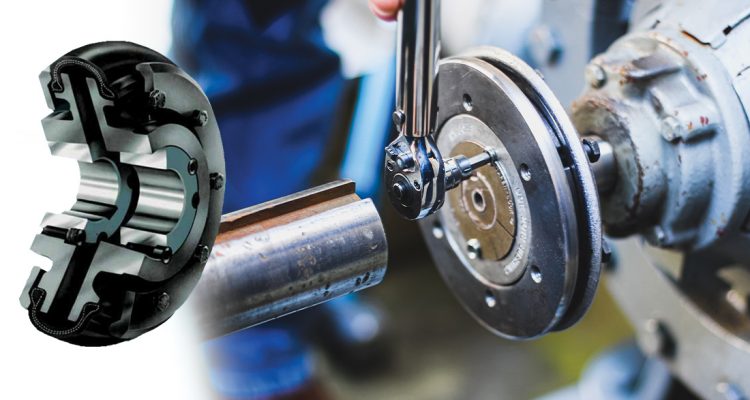
The main job of a coupling arrangement is aligning two drive shafts in order to transmit power between them. A standard coupling arrangement is constructed with two flanges, and a taper lock bush design that secures the connecting shafts in place.
“Drive shafts are what give a machine higher rated horsepower,” explains Troy. “They are a significant component in the design and construction of automotive vehicles. But in a factory setting, they are also required on conveyor belts, pulleys, lifts and mobile plant equipment where machines are running under heavy vibrations.”
“The Fenaflex Tyre Couplings are unique in their design because they have a donut-style rubber tire between the two flanges of the coupling arrangement that has vibration dampening properties and torquing ability that allow for shaft misalignment on operations,” he furthers.
Heavy vibrations can cause cracks and fractures on drive equipment which can lead to equipment failures. “The Fenaflex Tyre Couplings do a good job of softening the impact of heavy manufacturing through shock absorption,” Troy adds.
Fenaflex Tyre Couplings can accommodate up to a 4-degree misalignment on an application, which is above a standard coupling. However, ensuring the flanges are parallel with the shafts still requires careful calculation of the gap between the shafts and any end-float required.
“The most common cause of a coupling failure is improper installation,” says Troy. “There are times when maintenance and repair staff have not received proper training on how to install the couplings, or the instructions are overlooked” he elaborates. “The result is that a coupling will be implemented on a high-speed, high-impact, application incorrectly which can cause cracks, fractures or breakdowns.”
To avoid this outcome, Troy suggests referring to Fenner’s knowledge and training hubs online.
“Fenner produces a lot of instructional videos and training resources,” says Troy. “My advice to operational managers would be to train up staff properly and ensure they have access to these channels. Alternatively, our team at BSC is always happy to make a site visit to assess the requirements for a drive system and assist in the installation process.”
The most important step of installing Fenaflex Tyre Couplings, according to Troy, occurs after the installation when it is necessary to test run a coupling under load and monitor the performance to ensure the torque is correct for the application.
He concludes, “End-users will get the best results from Fenaflex Couplings if care is taken on installation. It is important to keep installation resources close, make sure the Fenaflex tyre is seated correctly, check the gap, check the torque, and adjust the screws accordingly.”
Quick Tips on Installing Fenaflex Tyre Couplings
• Always refer to the manual of each product for torque ratings
• Ensure all mating surfaces of the assembly taper balls, flanges, taper lock bush, and bores are cleaned prior to assembly
• Always take into consideration end-float and misalignment
• Measure the gap between the shaft to the appropriate distance
• Lay a straight edge across the flanges in several areas to check that they are parallel to one another
• Post-installation, run the couplings under load for a test period
• Check the torque to ensure it is correct