Nothing can slow quarry production down like wet conditions. When water permeates the quarrying process, the extracted minerals, gravel, and sand quickly turn to sludge and slurry which are common by-products of daily quarry operations.
As a result, quarries heavily rely on effective pump applications to manage and control the ingress of water on site, and keep production running.
Pump systems in general vary in their ability to withstand the rugged conditions of heavy industrial applications, according to Troy Markland, National Product Manager for Chain and Ironware at Motion Australia.
“The performance of a pump system depends entirely on how it is assembled – from design and manufacture to the sealing and power transmission components,” he says.
“Slurry and sludge pumps use greater or lesser degrees of centrifugal and hydraulic force to displace watered down materials, and in most cases using a specialised dewatering pump is the most efficient and cost-effective solution for a quarry.”
Consequently, it is necessary for quarries to make some considerations when designing and fitting slurry pump assemblies, highlights Troy.
“Slurry pumps typically consist of two shafts– one for driving and the other being driven,” explains. “Power comes from the motor and transfers to the turning shaft through a coupling arrangement.”
“Ensuring a pump system is fitted with the right coupling components is critical to the performance of the application, as any heavy vibrations and loads can cause cracks and fractures on drive equipment,” he explains.
“Furthermore, pump systems are often located underground and requiring heavy lifting and rigging equipment to install. So, they can be difficult to maintain and repair if there is an issue.”
According to Troy, joining two aligning drive shafts is very difficult to do without any deflection and misalignment. Therefore, preventive maintenance on coupling components starts at the point of installation on pump systems.
From Motion Australia’s portfolio, Troy often suggests Fenner coupling solutions to quarrying customers for the most robust drive shaft solutions that can stand up to the abrasive nature of sludge and slurry.
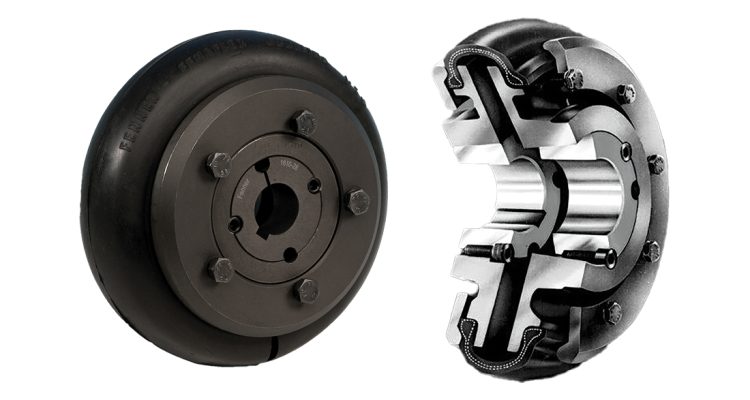
“The Fenner Fenaflex Tyre Couplings are the preferred choice for both aboveground and below ground pump applications due to the Fenaflex tyre, it can accommodate a high degree of misalignment – up to four degrees,” he explains.
For below ground applications, a FRAS rated (Fire Resistant Anti-Static) tyre is recommended.
“The rubber tyre also does a good job of softening vibrational force through absorption,” he adds. “Making them very versatile and flexible on heavy load and high torque applications.”
Working closely with Fenner application engineers, Troy has gained a good understanding of fitting the Fenner Fenaflex Tyre Couplings on quarry pump applications, putting together a brief installation guide for quarry operators to refer to.
Troy’s Guide to Easy Installation of the Fenner Fenaflex Tyre Couplings
• Firstly, all mating surfaces of the assembly taper balls and flanges, and taper lock bush bores should be cleaned to remove any debris that might impede assembly.
• Before placing the flanges on to the shaft, loosely place the bush into the taper lock bore and align the half holes correctly.
• Remove clamping rings and screws.
• Place loose clamping rings onto the mover and drive machine shaft before locating coupling flanges.
• If keys are required, side fitting keys with top clearance should be used.
• Once the clamping rings and flanges are in place, tighten the fixing screws to the required torque* detailed in the instructions supplied with each bush.
• For keywayed flanges, place on the shaft, locate keyway, and tighten screws.
• Bring the shafts into alignment, taking into consideration end-float and misalignment.
• Measure the gap between the shaft to the appropriate distance.
• Lay a straight edge across the flanges in several areas to check that they are aligned parallel to one another.
• Open the tyre and place over the coupling flanges ensuring it is seated properly, closing the gap of the tyre.
• Replace the clamping rings over the flanges and tighten the clamping ring screws evenly until the correct screw torque is achieved.
• There should be no metal-to-metal contact between coupling flange and clamping ring.
• Run the coupling under load for a test period, if possible and check the torque to ensure it is correct.
*Always refer to the manual for each product for torque ratings.